Deciding to take on the task of do-it-yourself car maintenance is quite a challenge for first-timers. If you’re not confident about your tools and equipment, even if you’ve got all the skills, making mistakes can be daunting.
Performing auto maintenance yourself can be intimidating, but you don’t have to be afraid of trying your own DIY project as long as you know what to do and where to start. Think of the amount of cash you can save here just by giving a spare of your time!
Now, get all your tools ready and muster all that courage (Yes, you may also get your phone to check online tutorials!). Ready to begin with your project?
Great! But, first things first. Before doing repairs make sure to get these 3 things ready.
First, your working space.
Before deciding DIY maintenance, make sure that you have ample space to work on. Check if your garage or driveway can accommodate the work. Having enough space to move around is very important especially if you’re replacing brake lights or brake pads where you need to check both the front and rear wheels.
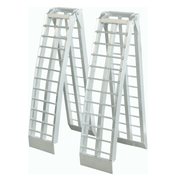
Next, your service ramps.
Car maintenance is not only about lifting the hood to check the engine. At some point, you may have to raise the car up off the ground. Using car ramps can be more convenient and safer to use than a jack and axle stands if you have a sloped driveway (although we'd always recommend working on a flat surface). If you don’t have this yet, better get a pair. It’s a good investment especially if you’re planning on doing this task in the long haul.
Let’s talk about car ramps a bit longer. Getting a pair of car service ramps can give you a lot of advantages. We mentioned earlier that car ramps are safer to use than jacks. Why? Since they come in pairs, the car will be raised on both sides evenly so you won’t run the risk of picking the wrong jacking point.
Car ramps are also easy to use. Just follow these 8 simple steps and you’re good to go.
Step 5: With the motor running and your vehicle in gear, slowly drive it straight onto the ramps. Due to the steep incline of the ramps, the vehicle may not move forward at first so you may need to give it more gas.
Step 7: Continue driving slowly up the ramps until your vehicle levels out and then stop immediately. You can either find the correct place to stop purely by feel, or you can have a friend spot you from outside the vehicle.
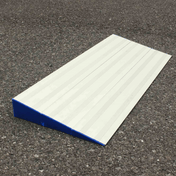
Finally, wheel chocks.
You might think using wheel chocks sounds excessive but when it comes to safety, it’s worth it. After moving your car up the ramp you need to use chocks on the rear wheels to prevent the vehicle from rolling. In addition to setting the brakes, wheel chocks help in minimizing the risk of any accidental movement.
These are just three things but should not be taken lightly. Once you’ve got everything ready, you can start your DIY car repair project with ease and confidence.
We’ll be glad to know how it ends up by sharing your experience in the comment section below. If you need additional information on car service ramps or wheel chocks, don’t hesitate to call us and our friendly staff will be glad to assist you.
Shop Car & Truck Service Ramps